Hello, readers! Although we are no longer posting new items on our blog, we are keeping it available so you can browse through our past posts. Thanks for visiting!

Jan 31, 2011

{Linky Party Features!}

Thank you to everyone who joined our first "Want To Play?" Wednesday linky party! We had some awesome and creative projects linked up and it was hard to pick our favorites.

Here are some that are not to be missed!

shows us how to make

This is so easy and looks delicious! 
Such a fun thing to do with your kids on a snowy afternoon.


shares her

So sweet! 
Alison also provides a download link so you can make your own!


shows us how to make

Mmmm Yum!
Danielle shares her version of the recipe and how her kids helped out.
Yay for kids baking!


shares this adorable

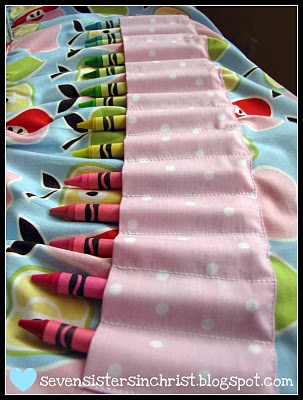
What little girl wouldn't love to have this crayon apron!
They also provide the link to purchase the apron pattern.


Thank you, ladies! 
Please feel free to grab our "I've Been Featured..." button on the sidebar.
 
Pin It

Jan 29, 2011

{Pillow Sash}


Here is a cute and easy way to decorate for Valentine's Day.
It's a pillow sash!

I bought the ribbon on after-Christmas clearance, and I found the little wooden heart medallion for $1 at Michael's.


I added some velcro to the back for easy removal, and my plain sweater pillow is now a Valentine's Pillow!

If you are interested in making your own sweater pillows, Brassy Apple has a great tutorial. I can't wait to make one like hers...


...the one in front is my favorite! I just found a sweater with ribbing like that at Goodwill last week, and it's burning a hole in my new sewing tableHowever...we are in the midst of painting our kitchen so it might be awhile before I can start a new project.

While I was at it this morning, I whipped up a St. Patrick's Day pillow sash with more of my after-Christmas clearance ribbon. 


Here is my new Valentine's pillow next to its friend on the couch.
What a fun and easy way to add some LOVE to the room!


--Tammy

p.s. Don't forget to link up to our first linky party...it ends on Sunday.
p.p.s. Don't you just love the word sash? It's just fun to say. Sashhhhhh. Sashhhhhh. Sashhhhh. I'm going to sashay across the room with my new sash....

* Please click HERE to see all the lovely Linky Parties we like to participate in!*


Pin It

Jan 27, 2011

{An Everyday Valentine}

I wanted to make a Valentine craft that could be left out all year long and I've always wanted to make a scrabble-tile frame, too.

This is what I came up with:


Red, white and shades of brown are perfect.

You can make one, too:

* Grab a frame you love
* Round up your scissors and hot glue gun
* Find some brown-toned patterned cardstock paper
* Gather scrabble tiles to spell the words you like
* Snag some red velvety ribbon
* Pick a pretty white button to finish it off


Then glue it all together.

Place it in the frame and you're done!
Super cute.
Super simple.
Super sweet.

Enjoy!

-Annie

P.S. Don't forget to link up to our Wednesday Linky Party!
Linky is open until Sunday night. 

*please click HERE to see all the lovely Linky Parties we like to participate in!*

Pin It

Jan 26, 2011

{WANT to PLAY? Wednesdays Linky Party!}

Hooray!  It's Peppermint Plum's first

LINKY PARTY!


Peppermint Plum
 
We want to see the cool things you have been creating this week!
 
This linky is open to almost anything:
 
CRAFTS, RECIPES, REDO'S, DECOR
 
But please, no links to online stores or giveaways at this time.
 
The simple rules:
 
1. You must first become a follower of Peppermint Plum to link up.
2. You must post either the "Want To Play?" linky button in your post, or have a word link back to the blog. Just spread the word so others can join in, too!
3. You may link more than one entry, as long as it fits the categories above.
4. Don't forget to comment on the projects you like!
Comments = Awesomeness
 
The linky will be open from Wednesday morning until Sunday night.
We will then highlight some of our favorite not-to-be-missed projects the following week.
 
Ready.... Set.... LINK!
 
 
Pin It

Jan 25, 2011

{Yo-Yo Valentine}


A little while back, we were lucky enough to do a guest post on Tatertots & Jello!

We shared the following tutorial on how to make a cute hanging fabric
Yo-Yo Valentine:

First, gather your supplies:

Embroidery Hoop (4 inch hoop used here)
Red fabric
White fabric
Decorative Button
Embroidery floss


Start by placing your red fabric in the embroidery hoop, smooth out all of the bumps and creases, and tighten the screw.
Next, make your fabric yo-yo!


There are many tutorials online on how to make a fabric yo-yo. They are simple to make by hand, or you can purchase “yo-yo makers” at most craft supply or fabric/notions stores.

Heather Bailey has an easy-to-follow handmade yo-yo tutorial here.


Once the yo-yo is complete, it’s time to sew on your decorative button.


Sew the button to the yo-yo, then sew the yo-yo to the red fabric inside the hoop. You can sew it any place you like. Right above the center looks the best when turning the Button Yo-Yo into a flower.
Now it’s time to hand-stitch the stem with the green embroidery floss.

Don’t forget to stitch the leaf in a heart shape -- that’s what makes this a Yo-Yo Valentine!
Once the stitching is complete, you will want to make the edges of the embroidery hoop presentable. Wrap the red fabric hanging out of the hoop towards the back. Hot glue the fabric to the wooden hoop, from the inside, or just tape it all together. Hot gluing it will make it hang closer to the wall, but taping it works fine if you plan on setting it on a shelf to display.

That’s all there is to it!

This is such a quick and easy craft and adds the perfect *pop* of color to any Valentine’s Day display.


Don’t want to make your own?
We've got you covered.
Visit our PeppermintPlum Etsy shop to purchase one of ours, already made and ready to ship!

Enjoy!


 - Tammy + Annie -

....linking to....


Pin It

Jan 24, 2011

{Eat Your Veggies}


Why is it that when someone else prepares fresh vegetables they always look so much more appetizing than when I chop them myself?
Or is it just me?

Well...Aunt Peggy blew us away at our family Christmas party a few weeks ago with this:


So today I tried my best to copy it:

My friend, Norma, suggested putting the dip inside a pepper to make it even more fun!


Sometimes it's all about the presentation, folks.

Veggies are veggies, but when you take the time to make them look posh (that's a fancy word for fancy), they magically dissappear! 


sorry...I promise I won't imitate Fancy Nancy again...
--Tammy

...linking to...
Recipe Swap Sundays
Made With Love Mondays

Pin It

Jan 22, 2011

{Retro Valentine Printable}

Let us take you back for a minute....

..... all the way back to 1992.....

Does this song bring up any memories for anyone else?

 "I Love You Period" by Dan Baird.

I love you period
Do you love me question mark
Please please exclamation point
I wanna hold you in parenthesis

Eh?  Eh?  It sounds vaguely familiar, yes?

This should help:


Ha!  Awesome, right?

Since this song gets stuck in my head all the time, I thought I'd make a Valentine printable for you to give to your special Valentine love.

Then it can be stuck in your head as well.

You're welcome.

:)

-Annie

(please feel free to print the "I Love You Period" Valentine for your own personal use)


Pin It

Jan 21, 2011

{Giveaway Winners!}

THANK YOU to everyone who entered our first giveaway!

Each winner will receive one of these packs of red, plastic envelopes.


And the winners are:


Comment #7: COLLEEN!

Comment #2: KELLY!

Hooray! 
Congrats, ladies!
I will be in contact with you soon.

Thanks for playing!

-Annie

Pin It

Jan 20, 2011

{Valentine Snowflake Garland}


I've always wanted to make snowflakes out of coffee filters, so today I decided to make heart-cut VALENTINE SNOWFLAKES!

I love how they turned out and I want to share the tutorial with you.

Coffee filters are the perfect medium for making snowflakes; they are perfectly sized, already cut round and thin enough to cut many layers at once.

You can make these snowflakes faster than it will take you to read this post!

I'm including a step-by-step photo tutorial on how to make these 6-point snowflakes (which in my opinion are MUCH cuter than the typical square snowflakes).

This tutorial should be self-explanatory.  Just enlarge the photos, if needed, for more details.


Step #6 is to show you where to make the cuts. 
The blue-inked portions are the parts that will be cut off completely. 
The remaining white portions will be the snowflake.

You are basically cutting two half-hearts and rounding off the point.


Once you have finished step #10 (the end of the cutting), carefully unfold the snowflake and flatten it as much as possible.

Then, glue your finished snowflake to some pretty patterned cardstock with a glue stick.
It's best to start glueing from the center, out.
That way, you can straighten and flatten as you go.

Make as many snowflakes as you want!  I wanted mine to span the width of a door frame, so I used 5 snowflakes, each with their own different patterned paper backing:
Next, punch two holes at the top of each snowflake and thread your ribbon through each one.

Space your strung snowflakes evenly along the ribbon and hang your finished garland anywhere you need some colorful Valentine love!


Enjoy!

-Annie

P.S.  Don't forget to enter our GIVEAWAY
Entry comments must be posted by midnight tonight! 
Good luck! 
:)


...linking to...


Pin It

Jan 17, 2011

{GIVEAWAY + VALENTINE PRINTABLE}

That's right! 

Peppermint Plum is pleased to announce our first giveaway!

To thank all of our lovely followers for your support, we are giving away 2 stacks of these red plastic envelopes to 2 different followers!

Each stack contains 30 red plastic envelopes. 
The envelopes are 5.5 inches square and are seriously awesome.

They are perfect for handing out school class Valentine's!

Or, save them for next Christmas.
Or, do whatever you want with them!  We don't care, as long as you show them a little love.

Also, by request from Tammy's son, a not-so-girly Valentine printable.

Personally, I would choose these as well. 

:)

If you, too, are looking for a Valentine for for boys that is not overly fluffy and frilly, here you go:


Awww yeah! 

Please feel free to save and print this monster of a Valentine for your own personal use.


The simple steps to entering our giveaway:

1.  Be a FOLLOWER of Peppermint Plum
then
2. Leave a COMMENT letting us know that you would like to win.

That's it!

Of course, if you would like extra entries into the giveaway, you can like Peppermint Plum on Facebookmention the giveaway on your own Facebook page and/or on your own blog.

(because spreading the word is super-good-fun!)

Just leave a separate entry for each one letting us know.
That's 4 ways to win, folks!

Also, please be sure to leave a way for us to contact you if you are a lucky winner!

We will choose 2 random winners on Friday morning, so you have until Thursday night to enter.

GOOD LUCK!

-Annie

*giveaway is now closed. Thanks for playing!*


Pin It
Related Posts Plugin for WordPress, Blogger...