Hello, readers! Although we are no longer posting new items on our blog, we are keeping it available so you can browse through our past posts. Thanks for visiting!
Showing posts with label tutorial. Show all posts

Oct 5, 2011

{Skeleton Portraits}


OoOoOoOoh, spooky!

Want to make your own?
All you need are some basic crafty supplies that you probably already have laying around.


I found two gold frames at Savers thrift store back in March of this year and I grabbed them with this very project in mind!  Once October arrived, I knew it was time to put them to use.

I sponge-painted the frames with black craft paint, allowing some of the gold to still show through.

I then printed out this skeleton head:
and cut out the skull, jaw, eyes and nose with an exacto knife.
I then taped it onto some burlap and sponge-painted the areas I wanted to be black.

Once the paint was dry, I cut a large oval around the painted image and hot glued the burlap directly onto the back of the frame.

(Does anyone else hate working with burlap?  Yuck, so itchy and messy!  Why do projects with burlap have to turn out to be so cute?)


Once the burlap was secured to the back of frame, I tied 2 bows out of orange and white polka-dot grosgrain ribbon.

I then hot glued the bows to the burlap.

A dapper bow-tie for the gentleman:


And a lovely hair bow for the lady:

You should definitely add some Skeleton Portraits to your Halloween decor this year!

-Annie

*Please check our Linky Party tab or our sidebar for the weekly parties we participate in*

Pin It

Sep 18, 2011

{Ghostie BOO Garland}


Here's a quick and easy-to-follow photo tutorial on how you can make your own Ghostie Boo Garland!


Tissues (2 for each ghost, layered)
Cotton balls (4 for each ghost head)
Floss or white thread (to tie around neck)
Black marker (to make eyes)
Embroidery floss (to string ghosties onto)
Long needle (to poke through ghostie neck)


Once all of the ghosties are strung, you can make "BOO" tags to hang inbetween each one, or you can leave it just as it is.


I stamped the word "BOO" in black ink onto bright orange card stock.
I cut a "V" shape at the bottom and used black chalk to distress the edges.  I then folded the top of the card stock over the string and stapled the paper together, close to the string, to keep it in place.


That's it!
Hang it somewhere spooky and awesome and you're good to go.


Most importantly...  have fun!

-Annie

*Click HERE to see the linky parties we participate in!*

Pin It

Sep 14, 2011

{Halloween Printing with Fruits + Veggies}


I was cleaning out the fridge today, about to throw away some carrots and apples that didn't get eaten (shh.. don't tell my mother!) and I thought

"Hey wait a minute, I can be crafty with these!"

And... so can you!


All you and your little punkin's need to make some printed Jack-o-Lantern's is an apple, a couple of carrots and some craft paint.

Cut some shapes into the thick end of the carrot. I cut a triangle and a rectangle.  The long carrot stem makes these "stamps" really easy for small hands to hold when stamping.


Slice off one side of the apple.  Don't cut too closely to the core or else your stamp will look like an apple instead of the pumpkin shape you are going for.

Then, take the apple slice you just cut off and cut it in half to make a curved mouth.  You can keep it just how it is or make a few notch/cuts to make teeth.

Spread some paint out onto paper plates, grab some white paper and get stamping!

Super-easy, super-fun.

If you cut out each individual pumpkin print (once it's dry of course) you can string them onto a garland, or make them into a magnet or even gift tags to tie onto a loaf of pumpkin chocolate-chip bread for your neighbors (or to send directly to me... mmm).

-Annie

Pin It

Sep 9, 2011

{Lavender Linen Spray}


Did you know you can make your own linen spray at the cost of pennies? It's really easy, too!


This spray is very versatile. I use it to freshen up carpet, couches, even the air. A few spritzes in a room really liven up the place! A light spray of lavender helps anything smell fresh and relaxing.

I even make an alcohol-free batch and use it to tame my daughter's super-curly hair in the morning. She gets a big smile on her face when she smells the lovely scent :) And the natural oil helps keep her hair hydrated in our dry climate.


What you'll need:
A spray bottle
1 1/2 cups water
1 tbsp rubbing alcohol
100% pure essential lavender oil*
(*found at health food stores)

Boil water in a small pan for about 10 minutes to rid of any impurities. Cool to room temperature, and add alcohol and 20-50 drops of essential oil, depending on how strong you want your spray to be scented. I keep it at 20 drops. Stir to mix; use a funnel to fill spray bottle.

You can be creative with your scents...you can mix 2 different oils to get a unique flavor. One day I'm going to do Sandalwood and Vanilla. Mmmmmm....

 I like to make a large batch of this spray each time and fill several bottles at once. The oils are a little pricey...my tiny bottle was $12. But it goes a LONG way. I've made several batches and have hardly made a dent.

Add a cute tag and you have a thoughtful hostess or housewarming gift.


Here's what's typed on the back of my tag (click to view larger and to save/print if you'd like):

Pin It

Sep 5, 2011

{Spooky Party Treats}

Halloween is coming!  Hooray!  It is my favorite holiday.  I love being spooked.

Both Tammy's and my birthday are right around Halloween so we would always have combined Halloween costume birthday parties when we were young.  They were the best!  That might be why Halloween holds such a fun place in our hearts (thanks Mom!).

Here's a tutorial on how you can make your own simple Halloween party favors.

Gather your paper crafting supplies and a few plastic party favor boxes and get to work!

 
I found the cute Halloween creature head stamps at JoAnn's in the dollar section. Score!
Wrap the main paper around your favor box to determine the size you will need.
These boxes are 2" x 2" x 1".  They came in a 3-pack and were found in the party section at Dollar Tree.  Snip off the ugly, smashed bow that they come wrapped in and fill them with the candy of your choice (individually wrapped candy is best, as the insides of the boxes might not be clean).
I chose butterscotch hard candies because I'm secretly a 90 year old grandma.  Just kidding.  I love me some butterscotch!
Assemble all of your box wrappers and admire your awesome work... holy Halloween cuteness!

Wrap them around the boxes and secure them in back with a little tape.

Now hand them out at your Halloween party, give them to neighbors or take them to school to share with all of your best Halloween buddies!
Boo!

-Annie

Pin It

May 4, 2011

{Make Your Own TWIX}

I have always loved me a TWIX bar.
I may or may not have eaten one every day for lunch in 7th grade.


So...when I came upon a few different recipes for homemade TWIX bars I knew I had to try them out! I have since made these many times and have tweaked the recipe to my liking.

They really do taste like the real thing...maybe possibly even a little better!

{TWIX BARS}
48 Club Crackers (a few more than one sleeve)
1 c. graham cracker crumbs (one sleeve)

1/3 c. sugar
3/4 c. brown sugar
1/3 c. milk
1/2 c. butter
Topping*:
1 1/2 c. semi-sweet chocolate chips
1 1/2 c. vanilla baking chips
* Most recipes call for milk chocolate chips. I have tried milk and semi and I thought both were good....but one day all I had was 1/2 a bag of semi, so I decided to add vanilla chips to them, and it turned out to be the perfect combination for my taste buds! I do it this way every time now.
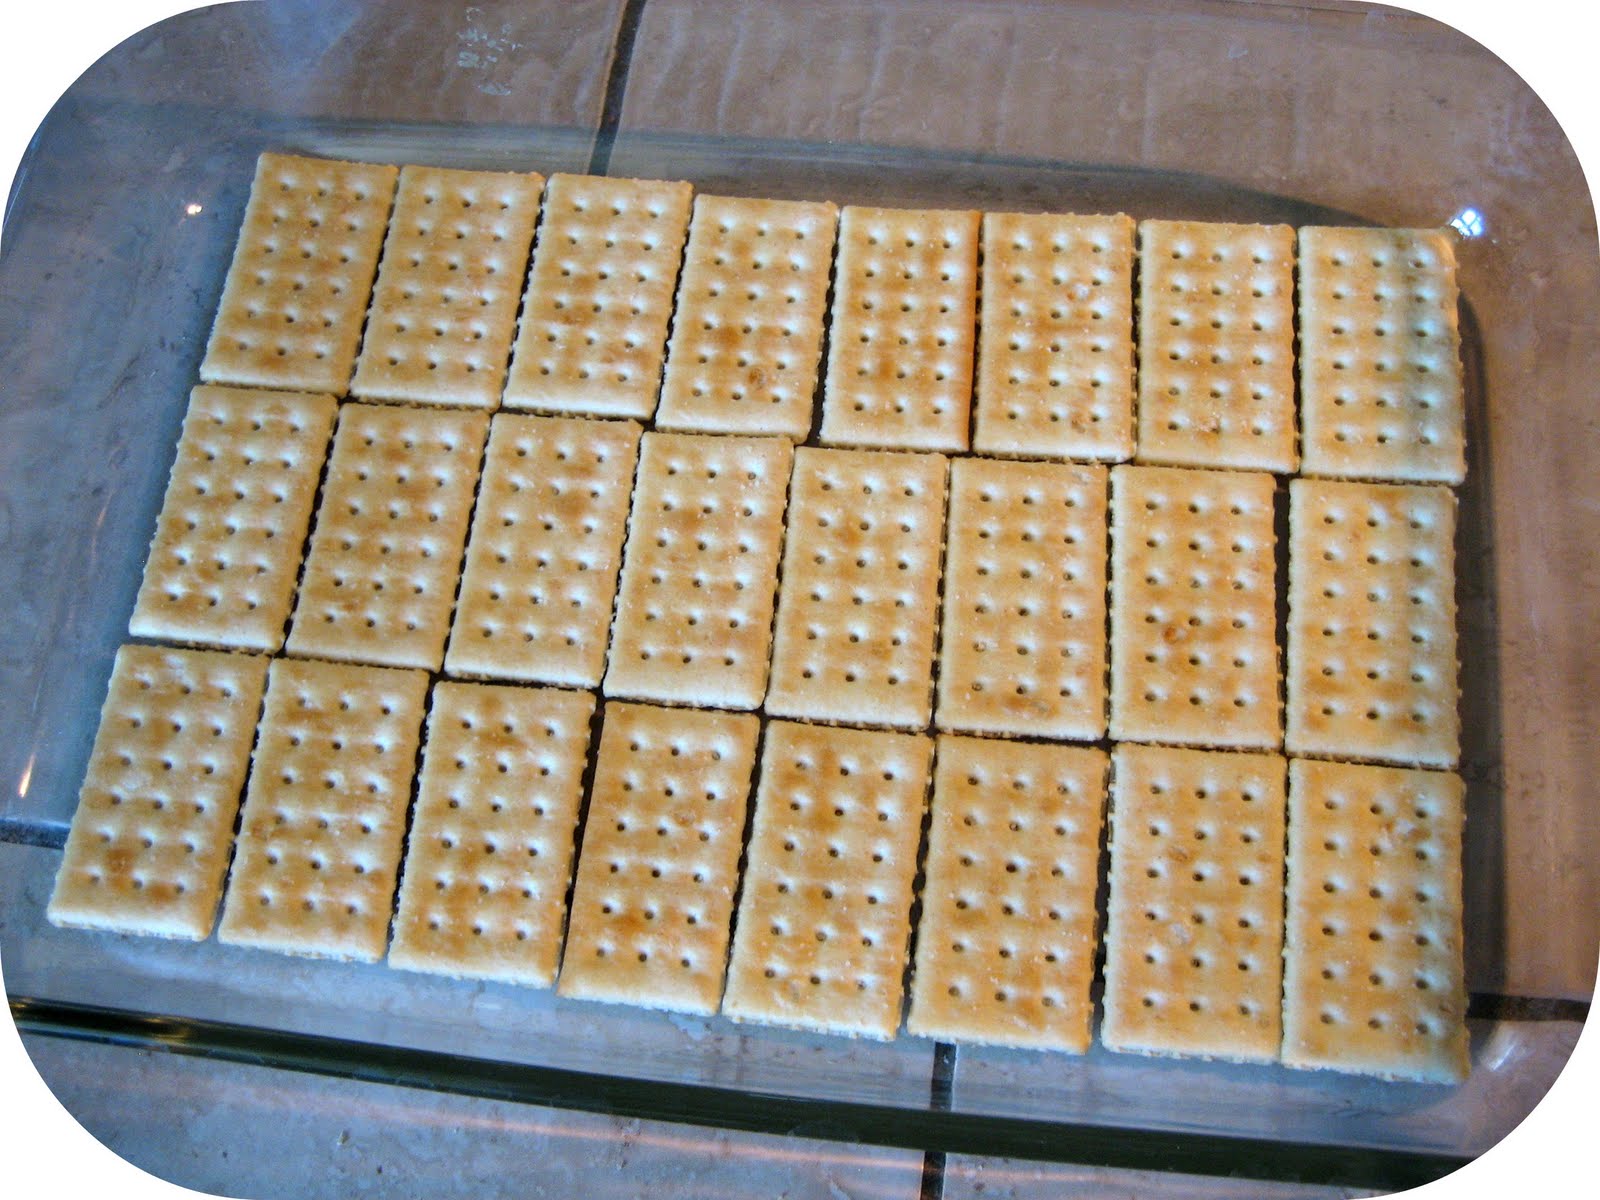
Place one layer of Club Crackers in a lightly greased 13×9 casserole dish.
Use your food processor or blender to make graham cracker crumbs, and pour into a heavy sauce pan. Combine remaining ingredients into pan and heat over medium heat until it comes to a boil, stirring constantly. Boil for 5 minutes (continue to stir). It should look (and smell) like caramel.
Carefully pour mixture over crackers.
Immediately place another layer of Club Crackers on top, pushing them down into the caramel mixture gently.

 Melt chocolate chips in microwave (on high in 30 minute second increments [thanks to a reader for pointing out that mistake!], stirring between each), and pour on top of crackers.
Refrigerate until cool, and then cut and serve.
Enjoy!
--Tammy

Pin It

Apr 20, 2011

{the GRASS grows GREENER still}

Last week we got to share this tutorial and free printable with the lovely readers at Mine For The Making (thanks Kara!) and now we would like to share it with you!


This free printable was created for you using part of a song called
which we learned when we were children in our church Primary class.

It's a reminder to us all that no matter how small we may think we are as individuals, we can still make a big impact and have a positive influence on everything and everyone around us.

"I'm small, I know, but wherever I go... the grass grows greener still."

You may have learned it as the "fields grow greener" instead of grass, but this is how we learned it and how it will always be in our minds.

Here is how we decided to turn this fabulous quote into a piece of framed art!


You can print your quote as large or as small as you would like.
Ours is printed on a regular-sized piece of cardstock and will fit perfectly in this 11x14 frame with an 8x10 opening.


Now it's time to add the grass!

We used a strip of moss from a "moss roll" that we found at JoAnn's last year.
The moss is a pretty, green color and makes for great grass.  Any type of green moss you find will work perfectly.


Using your hot-glue gun, glue the moss to the bottom of the frame.
We removed the glass from the frame so the moss is hot-glued right onto the mat.


Be sure to use smaller pieces of moss to fill in any thin spots so the white doesn't show through too much.  We want a nice, thick strip of grass!

Now it's time to embellish!


We made some fabric rosettes out of color-coordinating fabric strips.
There are so many awesome fabric rosette tutorials on the web right now and they are super-simple to make!


Just glue on your added bits of cuteness and it's ready to hang!

A perfect spot of SPRING to be admired all year long.

**********

We made this version in pink, aqua, greens and purple:


As well as this version in yellow, blue, greens and orange:


If you want to print your quote the same size as ours, here's a few tips on how to get it centered and printed from your Paint program:

First, right-click on the quote image above that you want and save it to your desktop.
Then, right-click on your saved image and open it in the Paint program.


Next, you will need to setup the page so it prints just right.
Go up to the top and select FILE, then down to Page Setup and you will see this screen:

Change the Orientation to Portrait.
Remove any check-marks in the Centering section.
Change the margins to show
Left: 1  Right: 1
Top: 0.5  Bottom 0.5
Then change the Scaling to Fit To: 1 by 1 page

The gray box on the left will show you how your image will print.
This way, you will have enough space around the quote to place it directly behind the picture frame mat and have enough open space at the bottom to add the grass and embellishments.

Then hit OK to save the changes and print it out!


We hope you enjoy this free printable and have a great time making your own!

-Annie + Tammy

Pin It
Related Posts Plugin for WordPress, Blogger...