Hello, readers! Although we are no longer posting new items on our blog, we are keeping it available so you can browse through our past posts. Thanks for visiting!

Mar 7, 2011

{Chalkboard Sticker Frame}

A few weeks ago I won a CSN giftcard giveaway from {DavesWife} at The Diary Of Daves Wife (thanks Kristy!) and while scouring the website trying to decide which goodies I wanted to buy, I came across this oval chalkboard sticker frame:


Ooh yeah!  I had to have it and it was only $14.00!
I didn't read (or remember reading) the dimensions of the sticker, so when it came in a large box, I was pleasantly surprised!  Turns out it is approx 28in x 23in.


You wipe the wall spot clean, peel the sticker paper off the back and stick it.

I only wanted the actual oval frame part to go on the wall, not the surrounding square corners (because duh, that would look lame) so I cut it out:


Which means I then have.....

Sweet!

I've mentioned before how small our condo is, so I didn't have very many options of open wall space to put this sticker.
I decided the best place would be right inside the garage door entrance (the only entrance we use) so the Mister and I can leave totally awesome and immature important messages for eachother.


Side note:  Nice placement of the fuse box, builders.
Really?  This is the best place for it in the whole house? Really? 
That's just swell and NOT AT ALL an eyesore.
*sigh*

I guess I could try to paint the panel the same color as the wall.  But, that would require thinking and planning and doing, so... I just covered it with some metal flower magnets and turned it into "art". 
Heh.

This is where the sticker is happily living:


And I love it!


-Annie

*Click HERE to see the lovely linky parties we participate in!*
Pin It

Mar 4, 2011

{Kitchen Makeover - The Big Reveal}


Our house was built in 1987, and whoever it was that had the house built decided to go for the cheapest kitchen layout possible. I have cursed this unknown person for 7 1/2 years! Our house has a great layout otherwise, but the kitchen is tiny and closed-in. Add in the builder-grade-honey-oak-turned-orange-stained cabinets and you have one heck of a miserable room. Just ask me...I've been letting it get to me every stinking day for 7 1/2 years!

We finally decided that something needed to be done, but we didn't want to put in the thousands of dollars it would have taken to get our dream kitchen. So for now, we decided to lighten it up and see if we could handle another few years here.

We removed all the cabinets and cleaned, sanded, primed, painted, glazed, and poly'd them. It all sounds so quick and easy to squeeze all those things into one sentence! Believe me, it was no easy or quick task.
We also painted the walls and the trim.
We added beadboard where we had shiny laminate panels before.
We added knobs that match the hinges (and the rest of the hardware in the house).
We took out some cabinets and installed an over-the-range microwave to free up some much-needed counter space.

 All the elbow grease and patience payed off, and now we have a light, bright space that feels so much bigger! It gives our home a whole different feeling. We are amazed at the difference it has made.
See for yourself!

This is what it looked like when we moved in:

 We put in the tile floors and countertops and painted the walls red.
And this is what we had for the next 7 1/2 years:

I forgot to take the before picture of the laminate panels before my hubby ripped them off...but I'm sure you can use your imagination.

This is the view from our family room looking into the kitchen:

And here are the after shots:


Let's see those befores and afters again:


Ahhhhh, much better.

--Tammy

ETA: Paint colors are Behr, Ryegrass on walls, Swiss Coffee on cabinets. Glaze made by American Finishes, Glaze Effects, in Van Dyke Brown.

* Click HERE to see the lovely linky parties we participate in! *

Pin It

{Giveaway Winner!}

THANK YOU
to everyone who participated in our crafty decor frame giveaway!


We had 41 comment entries.

The random winner selected is:

"BloggerThe Whites said...
I'm now following on Facebook. Thanks!"

Congratulations and thanks for playing!
(You will be notified by email as well) 

-Annie

Pin It

Mar 3, 2011

{Dollar Tree Mantel Vases}


The other day I decided it was time to liven up my mantel.
I visualized two simple vases with greenery, but I didn't want to spend a lot of money.

I remembered seeing these clear glass vases at Dollar Tree, so I headed there to pick them up.
While there I found a few other things I thought would work:


2 bags of white decorative container filler
1 package of floral foam
4 bunches of green berries
And of course...the two vases

I used a serrated knife to cut the floral foam down to a small-enough size to fit in the vases, then placed them in the bottom, stuck the greenery picks into them, and then filled up the vases with the little decor filler balls*.

{*Let me warn you...these little suckers are made of styrofoam, and they are charged up with static electricity, so they will stick to your fingers, your clothes, the inside AND outside of the vases, the outside of the plastic bags they came in, the countertop, the floor, and even your hair. It might be our dry Colorado climate, but it took a long time to get these little buggers to go into the vases! I'm sure it would have been a sight...I'm so glad I was home alone so no one could laugh at me or hear the foul language that may or may not have been spewing forth from my lips.}

I glued some grey grosgrain ribbon around the vases for a finishing touch, and then put them on my mantel and loved them.
Just the look I wanted...simple, fresh, green....and the best part?
I only spent $9.  


Dollar Tree rocks!


--Tammy

*Please click HERE to see the lovely linky parties we participate in!*

Pin It

Mar 1, 2011

{A Crafty Giveaway}

*This giveaway is now closed.  Thanks for playing!*


Hooray!

We, at Peppermint Plum, are excited to be having our second giveaway!
Are you excited to win?

Here's what's up for grabs:


This cute yo-yo and button decorated frame, just in time for
St. Patrick's Day!

This white frame from IKEA is 7" x 7" square with a 5" x 5" photo opening.
I've decorated one side with handmade fabric yo-yo's in two different green's, a sparkly orange and white fabrics. Two of the three buttons are from my vintage button collection!
The frame can be turned in any direction so the yo-yo's are on either side or the top as well.


If you want a chance to win this frame, all you have to do is leave a comment letting us know!

Pretty simple, eh?

If you want more than one chance to win, simply spread the word or follow Peppermint Plum on Facebook and leave a separate comment below letting us know!

We also ask that you become a follower of Peppermint Plum first... that way, we will have a better chance of contacting you when you win!

If you do not have a blog to link to your comment(s), you can leave your email address along with your comment.


Comment entries will be accepted until Thursday night and a winner will be chosen Friday morning.

GOOD LUCK!

*This giveaway is now closed.  Thanks for playing!*

-Annie


Pin It

Feb 28, 2011

{St. Patrick's Day Printable}

Tomorrow is March!  Can you believe it?
That means
ST. PATRICK'S DAY
is heading our way.
Break out the green and get your jig on!

Here's a free printable you can use for any ideas you can think of:
cards, tags, printed/framed, class treat bags, etc.
(for your own personal use, of course)

Small:


Medium:


Large:


Enjoy!

-Annie

(p.s. We've got a crafty giveaway planned for tomorrow...stay tuned!)

*Please click HERE to see the lovely linky parties we participate in!*


Pin It

Feb 24, 2011

{Bathroom Door Makeover}


... a wordless tutorial ...

...   ...   ...


-Annie

(pssst .... I found the wood cutouts at Michael's craft store)

*Please click HERE to see all the lovely linky parties we participate in!*


Pin It

Feb 21, 2011

{Cork Board Makeover}


I've had this cork board hanging up in the office above the computer desk area since we moved into our tiny little condo 16 months ago.

It was new when we bought it, despite the nicks and gouges you see here. 
These little buggers are quite fragile!
(helpful hint:  don't stick anything up with tape)

I hated the look of it.
The orangey "wood" frame and the boring brown cork itself -- ugh.
I pretty much just covered it with stuff to block it out.


Today, I decided enough is enough.
I'm going to make that baby shine!

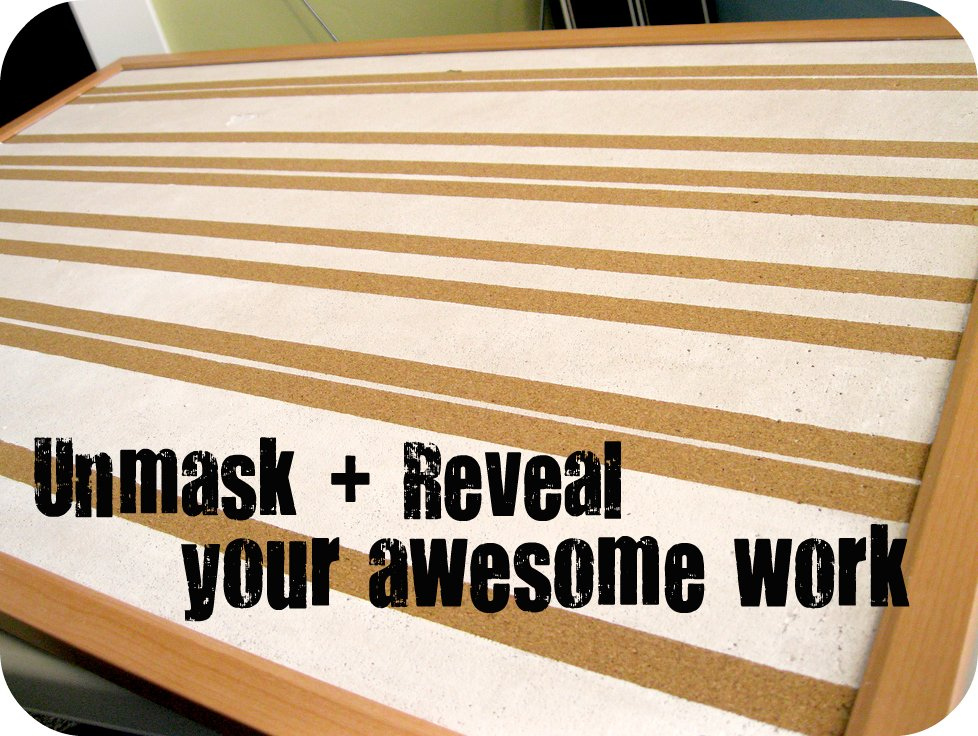
My original plan was to not only paint the lines on the cork, but also to paint the wood frame in a bright turquoise.  Unfortunately, the finish on the "wood" frame does not accept paint! Since I don't own a power sander that I could use to sand it down and make it more porous, I'm leaving it plain for now.  I will probably hot glue some ribbon around it in the near future.

Here's the How-To:


Too easy, right?

I think it adds just the right amount of design element to this area that gets a lot of use in our house.

Can't wait to finish it off with the ribbon border! 
I'm thinking a velvety turquoise ribbon will look splendid.

Enjoy!

-Annie
Pin It
Related Posts Plugin for WordPress, Blogger...